Skip to main contentRequirements
Admin access to an Okta Org
Supported Features
- SP-Initiated SSO
- IDP-initiated SSO
Configuration Steps
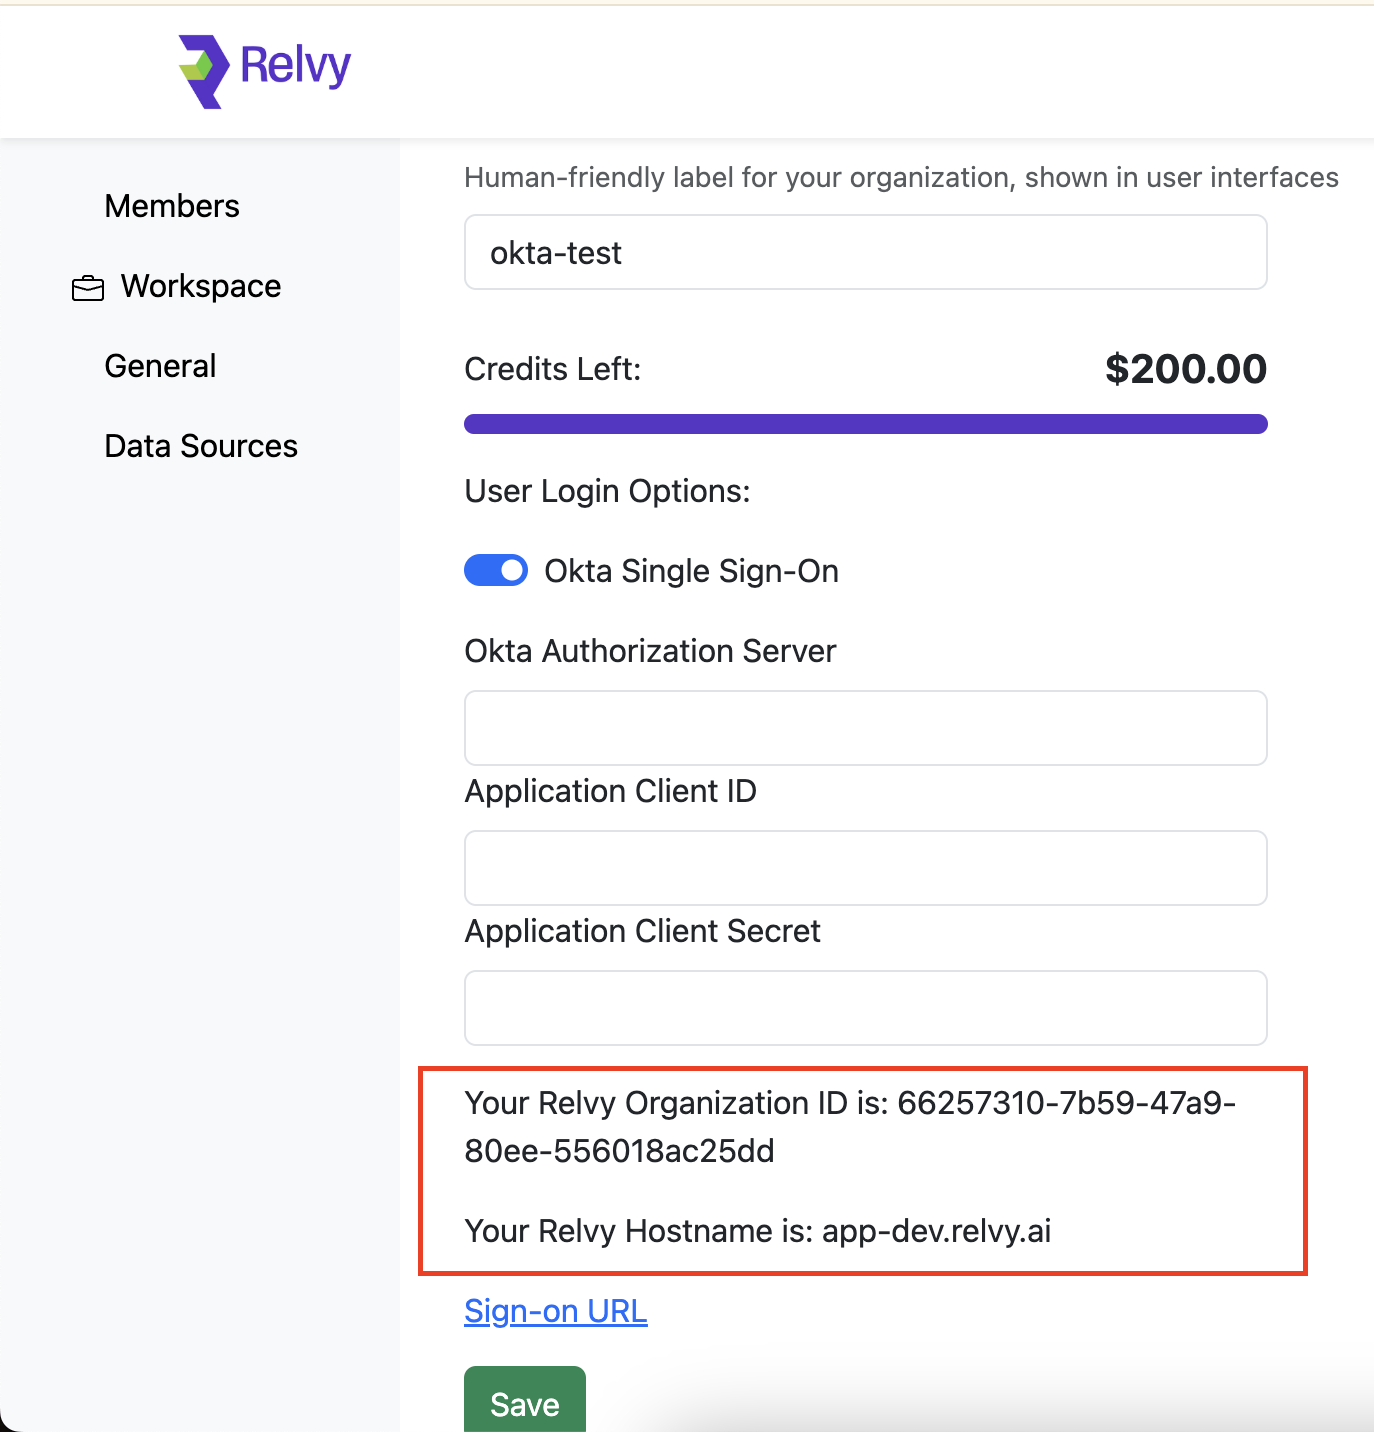
Step 1. Activate SSO for your organization on Relvy AI
1a. Head over to https://app.relvy.ai/account, and click on the Organization -> General menu item on the left
1b. Toggle the Okta SSO option, and note down the values for Relvy Organization ID, and the Relvy Host name.
Step 2. Install Relvy AI from the Okta Integration Network
1a. When prompted, provide the values you noted above for Relvy Organization ID and Relvy Host name.
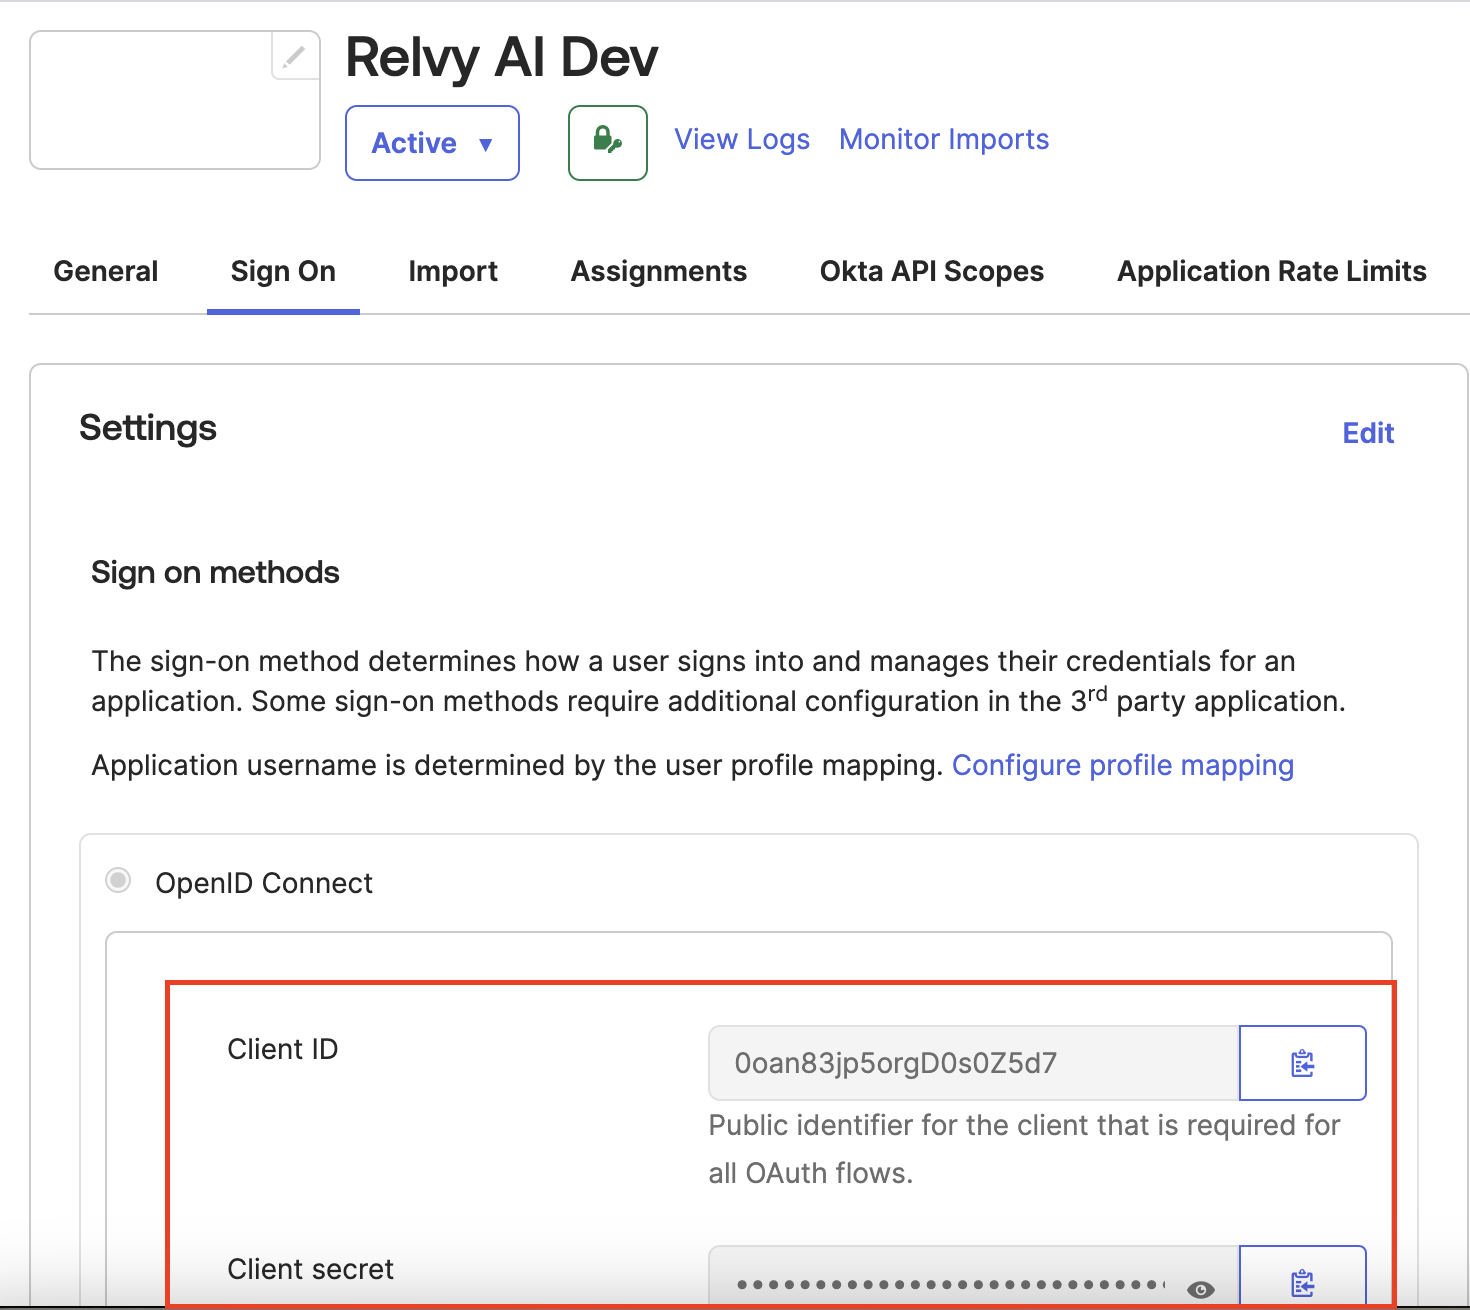
1b. Once the integration is installed, please note the client ID and client secret for your installation. You will need these along with the name of the authorization server for your Okta org.
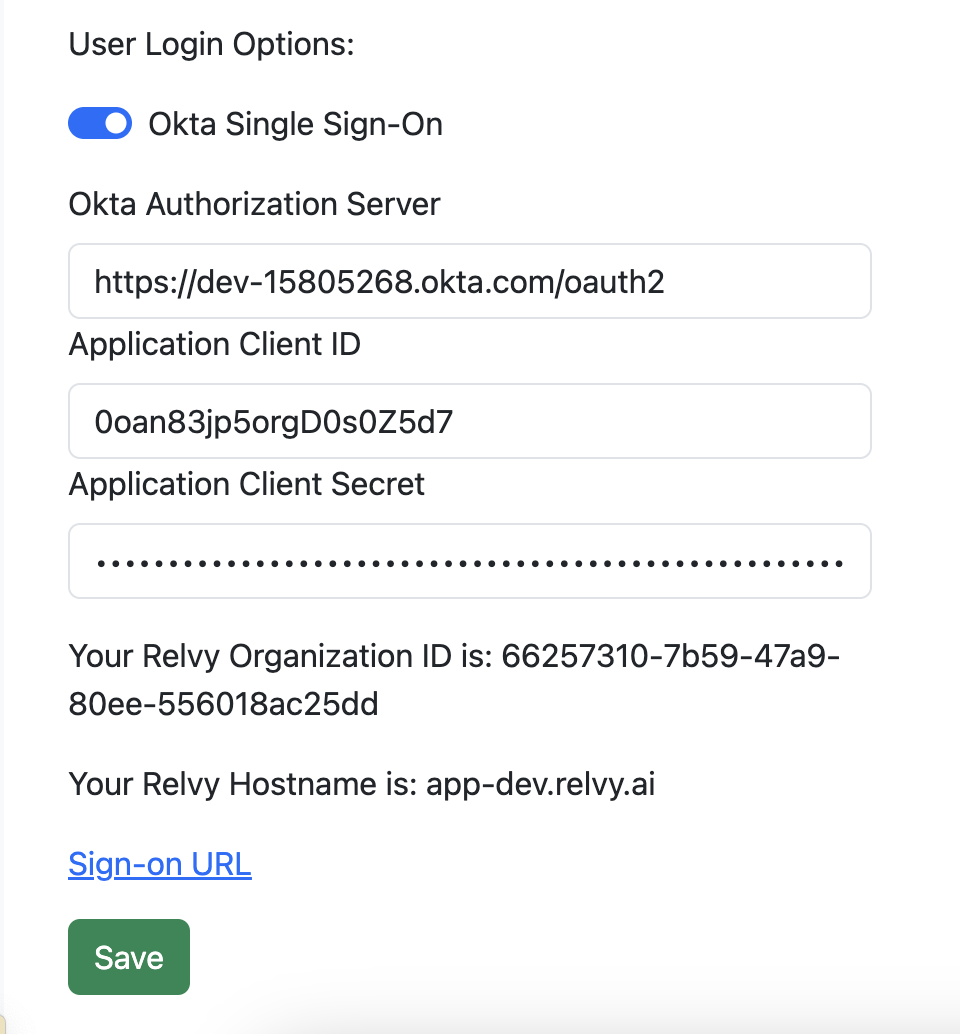
 3a. Head back to https://app.relvy.ai/account, and click on the Organization -> General menu item on the left
3b. Your Okta domain is of the form https://{yourOktaOrgId}.okta.com. For example - https://dev-123.okta.com
3c. Provide the Okta domain, client ID and client secret above and click ‘Save’.
3a. Head back to https://app.relvy.ai/account, and click on the Organization -> General menu item on the left
3b. Your Okta domain is of the form https://{yourOktaOrgId}.okta.com. For example - https://dev-123.okta.com
3c. Provide the Okta domain, client ID and client secret above and click ‘Save’.
Step 4. Set up is complete. Test
Test the sign-on URL from the above page to confirm everything is working as expected.
SP-Initiated SSO